The movie's content is now complete. To play the movie in a browser, you need to export it as a Flash Player file. Flash has been doing this for you every time you use the Test Movie command.
When you create a web site with Flash, you often need to include several accompanying files. In addition to a Flash movie, you must create an HTML document that opens in a browser and runs the Flash movie or displays other Flash-generated graphics. You may also want to create an animated-GIF version of your movie or a JPEG image to display if the Flash Player is not installed.
Use the Publish command to export to all the supported formats at once and create an HTML document with all the required settings.
| 1 | Make sure you've closed the separate window in which the movie was playing, and then choose File > Publish Settings. |
| 2 | On the Formats tab, select Flash and HTML. Make sure that the Use Default option for file names is selected. |
| Although you are not using any additional formats for this tutorial, this is where you can choose additional formats such as JPEG or QuickTime. | |
| 3 | Click the Flash tab. |
| You don't need to change any of these options now, but you may need them later for your own work. You may, for example, want the layers to appear from the top down instead of the bottom up as they do in this movie. | |
| 4 | Click the HTML tab. |
| There are several ways to control Flash movies with HTML code. The settings in the HTML panel let you define the most common and useful settings, including the size, positioning, color, and quality of the movie. Flash inserts the settings you choose in a template document. Flash includes several template documents containing HTML code for useful features like browser detection. | |
| To complete this tutorial, you will choose a simple template that does nothing except display the Flash movie specified. | |
| 5 | Choose Flash Only from the Template pop-up menu. |
| 6 | Deselect the Loop option. |
| This prevents the movie from playing over and over. | |
| 7 | Click Paused at Start so that no check mark appears in the check box. |
| If you leave this option on, the movie does nothing until an action starts the movie. You want the animation to play as soon as the page is loaded, so this option should be off. | |
| You don't need to change the default values for the remaining HTML settings. | |
| 8 | Click Publish and then click OK to close the Publish Settings dialog box and generate the specified files. |
| Flash generates the new files and stores them in the same folder as the movie file. | |
Play the movie inside a browser
Your work in Flash is complete at this point. Now you can see how the movie plays inside a browser.
| 1 | Open a browser such as Netscape or Internet Explorer. |
| 2 | Open the HTML file you just created. |
| In Netscape Navigator, chose File > Open Page, and then browse to locate the file. | |
| In Internet Explorer, choose File > Open, and then browse to locate the file. | |
| The HTML file is in the same folder as the movie file and has the same name as the movie, with an .htm or .html file extension. | |
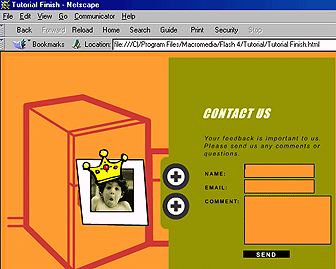
The movie should run inside the browser window just as it did when you used the Test Movie command.

|
|